The primary problem lies in the fact that the dowel pin is located in close proximity to the camshaft gear. If the pin dislodges and becomes wedged between any two gears at the front of the engine it is going to cause significant, possibly unrepairable damage. If the pin manages to dance to the bottom of the front cover, it will settle in the oil pan and [safely] reside there until removed. KDP issues are specific to 12 valve models (6BT), which therefore affects 1989 to 1998 model years. However, most KDP failures occur on 1994 to 1998 model year engines. Preventing the KDP from driving out of its bore is as simple as installing an inexpensive metal tab over the dowel pin using a neighboring bolt so that it cannot work itself out. Gaining access to the dowel pin, however, is somewhat labor intensive and requires removal of the front cover.
Cummins KDP Kit Installation Procedures
The radiator does not have to be removed to access the front cover, but we typically choose to remove it for better access. Removing the radiator is not particularly difficult and is outlined in the procedures below. However, keep in mind that this step can be skipped if you'd prefer not to. It creates a much larger work area and eliminates the risk of accidentally hitting it with a tool or cutting yourself on the sharp metal fins. The following procedures are also based on a 1996 model year engine, thus 1989 to 1993 configurations may appear slightly different; the steps ultimately remain the same.
Click any thumbnail to view fullsize, detailed image
• Disconnect both negative battery cables.
• Locate the radiator drain valve (petcock) on the driver side, lower corner of the radiator. Place a clean drain pan below the valve, then open it to drain the radiator. For most drain valves, rotate it ~1/4 turn, then pull outwards away from the radiator while continuing to rotate. The plug should pull out as it finishes its rotation (they can be stubborn).
• Remove the upper and lower radiator hoses once the radiator has drained completely.
• Remove the series of nuts holding the positive battery cable to the radiator using a 10 mm socket. Position the cable over the front of the engine so that it is out of the way.
• Remove the windshield washer fluid reservoir and overflow tank. Both slide into slots on the side of the fan shroud. Release the hemispherical detent and pull upwards to remove once the appropriate hose/connectors have been removed.
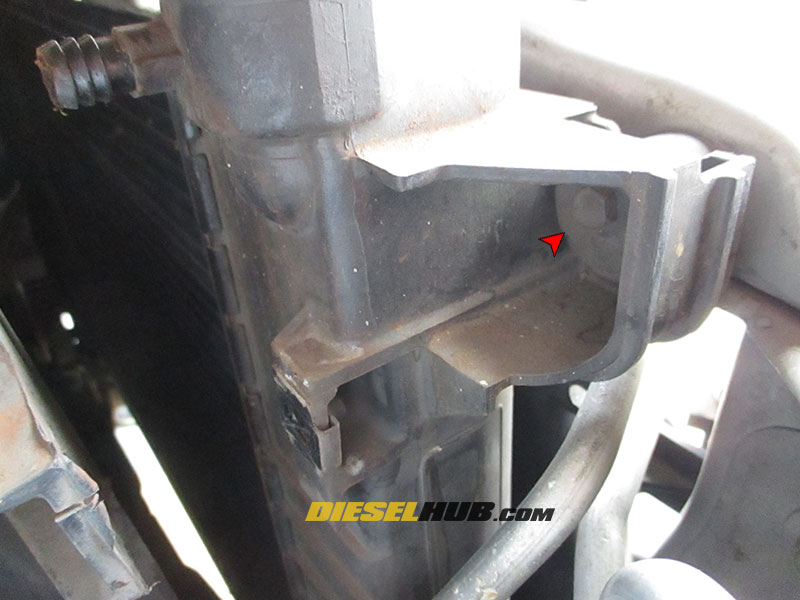
• Remove the (4) bolts securing the fan shroud to the radiator using a 10 mm socket. There are (2) bolts on the driver side and (2) on the passenger side. The driver and passenger side mounting locations are a mirror image of one another.

• Push the fan shroud forward and let it rest against the engine in order to access the radiator support bolts.
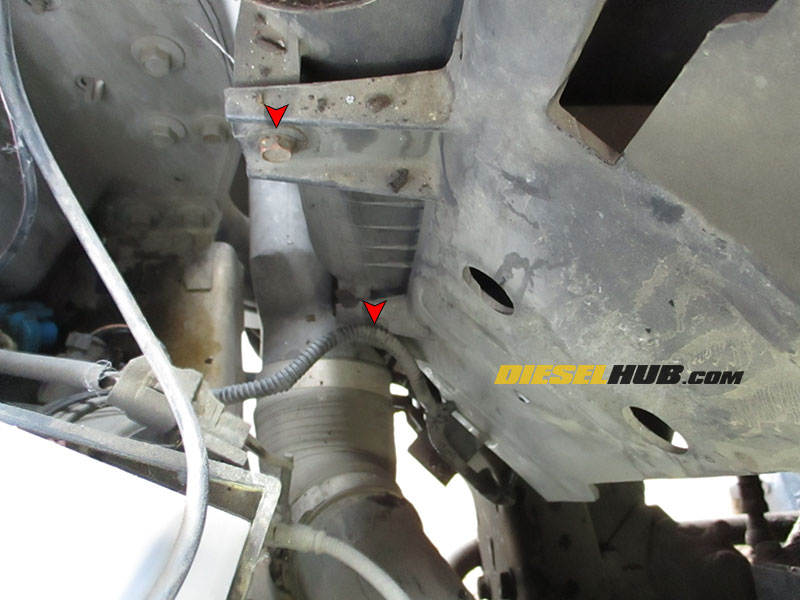
• Remove the (2) radiator support bolts; (1) on the passenger side and (1) on the driver side. The driver and passenger side mounting locations are a mirror image of one another.
• Pull the radiator upwards and out of the vehicle, then remove the fan shroud.
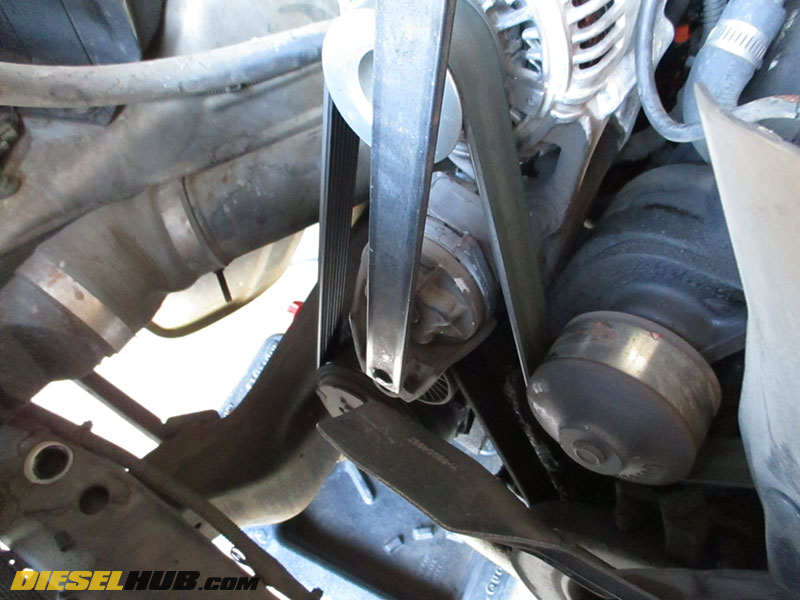
• Relieve belt tension using a belt tensioner tool with a 3/8" square drive, then remove the serpentine belt.
• Disconnect the RPM sensor electrical connector that is located above the fan assembly.
• Remove the (4) bolts securing the fan assembly to the engine block with a 10 mm socket or box end wrench.
• The bolt that is located behind the fan pulley must be removed last, as the bolt will not unthread unless the other (3) bolts have been removed first. The box end of most wrenches will fit behind the fan pulley. If necessary, grind an old wrench until it is just thin enough to fit. Set the fan in a safe place so that it is not accidentally damaged.
Note - If you opted not to remove the radiator, the fan shroud will now be removed with the fan assembly.
• Loosen the oil fill tube clamp bracket (portion that is clamping the fill tube neck) using an 8 mm socket.
• Remove the oil fill tube bracket (securing bracket to engine block) using a 16 mm socket.
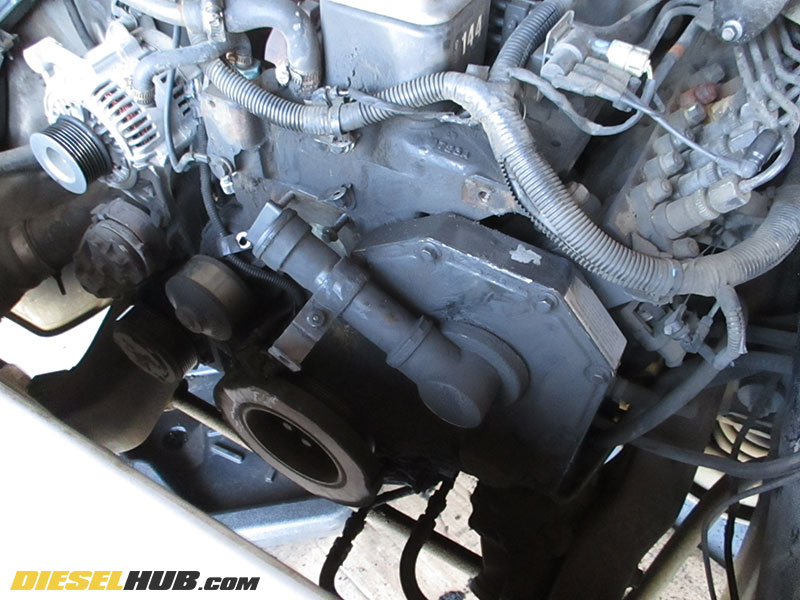
• Rotate the oil fill tube assembly until it unthreads from the front cover of the engine (approximately 1/2 turn to remove) and set it aside.
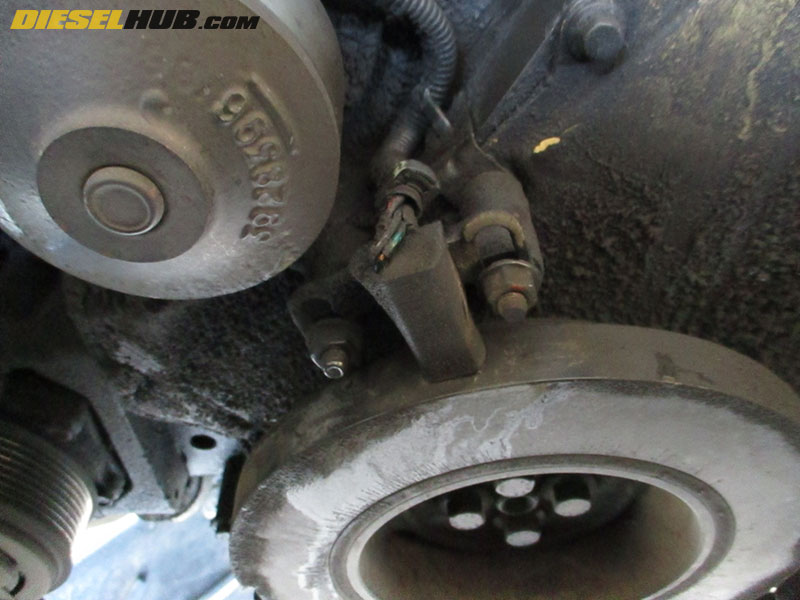
• Remove the RPM sensor (11 o'clock above the crankshaft damper) using a 15 mm socket. Set the sensor and bracket/spacer aside.
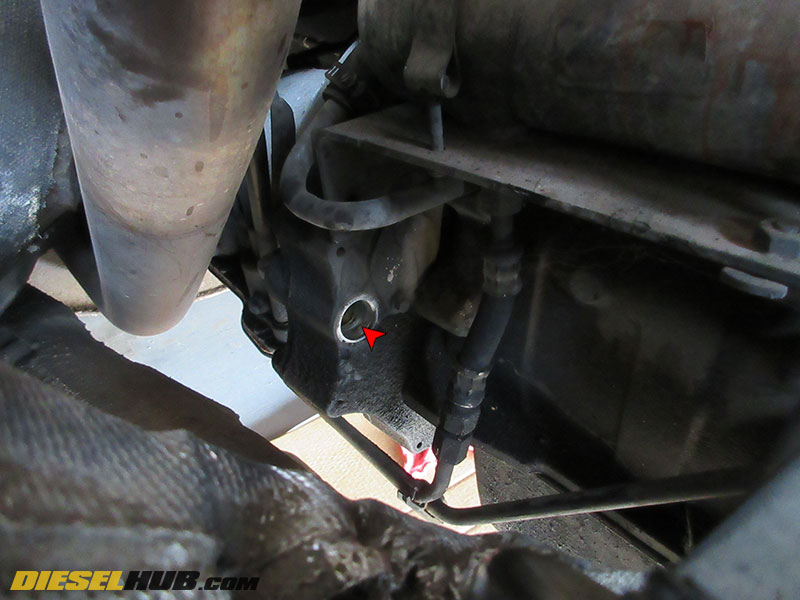
• Locate and remove the plastic plug in the bellhousing on the passenger side of the engine to the right of the turbo downpipe. It faces the front of the vehicle, not the rear of the vehicle.
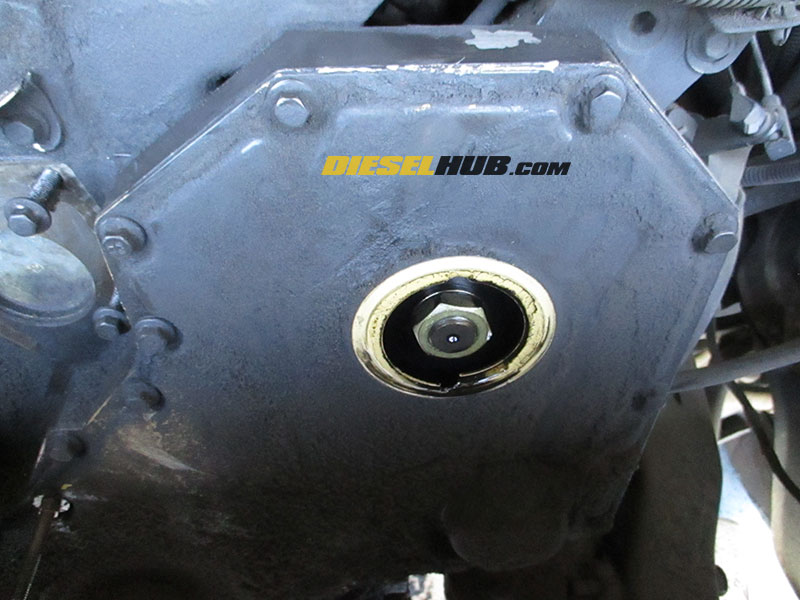
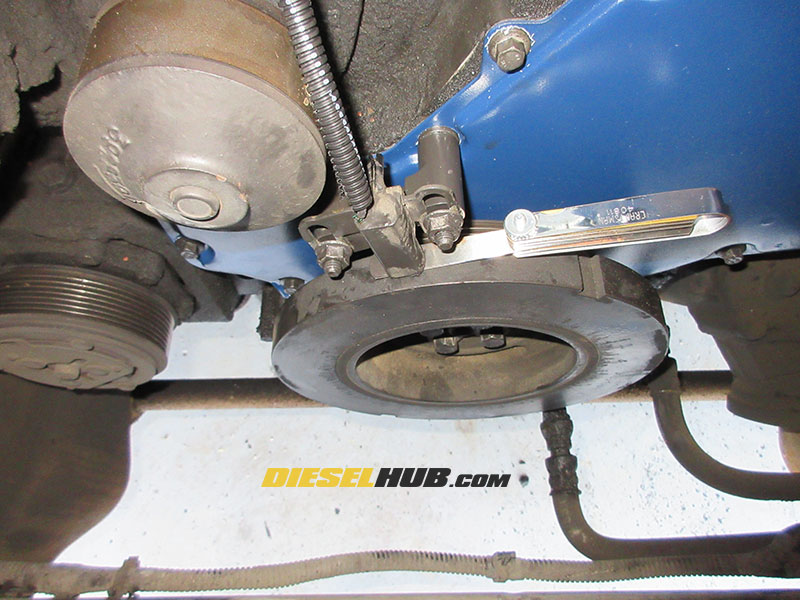
• Insert an appropriate engine barring tool (OTC 7471A) into the bellhousing hole and attach a 1/2 drive ratchet/breaker bar. This barring tool is used to turn the engine over manually via the flexplate and/or prevent the engine from turning; in this instance it is being used to prevent engine rotation while the damper is removed.
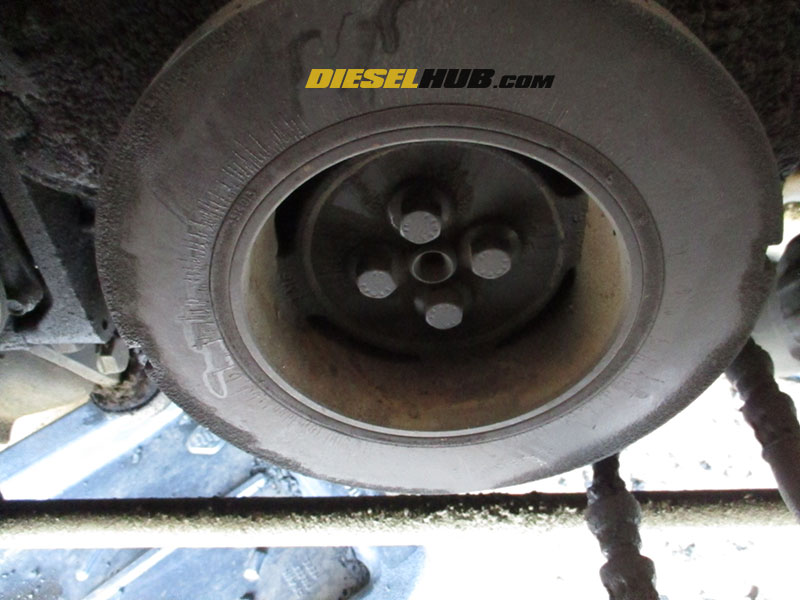
• Remove the harmonic damper from the crankshaft using a 15 mm socket; there are (4) bolts total. An impact gun or breaker bar can be used. If using an impact gun, do NOT install the barring tool from the previous step (you will still need the barring tool when the damper is reinstalled).
• Remove the (20) front cover bolts (2 are studs for the RPM sensor). Some bolts are longer than others, but it is not necessary to mark them as the bolt locations for each are apparent during reassembly. All bolts require a 10 mm socket or box end wrench.

• With the front cover bolts removed, carefully slide the cover over the crankshaft and set it aside.
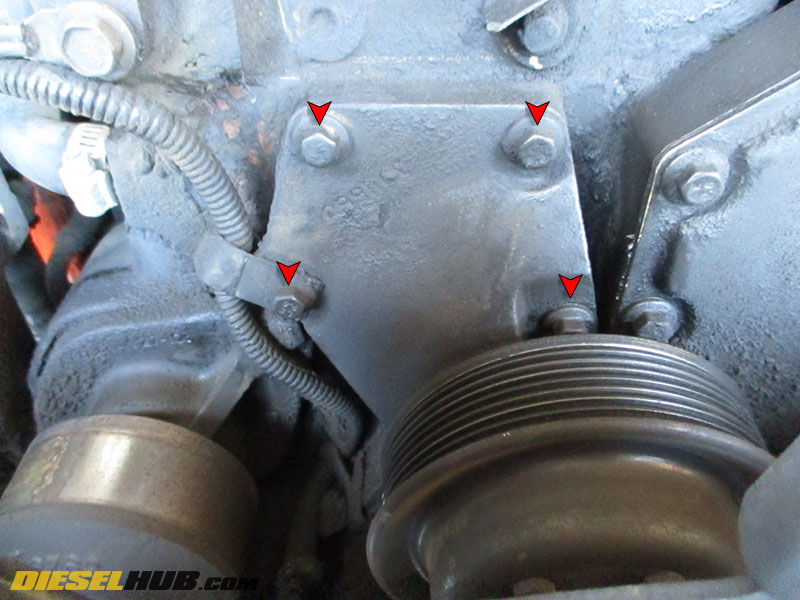
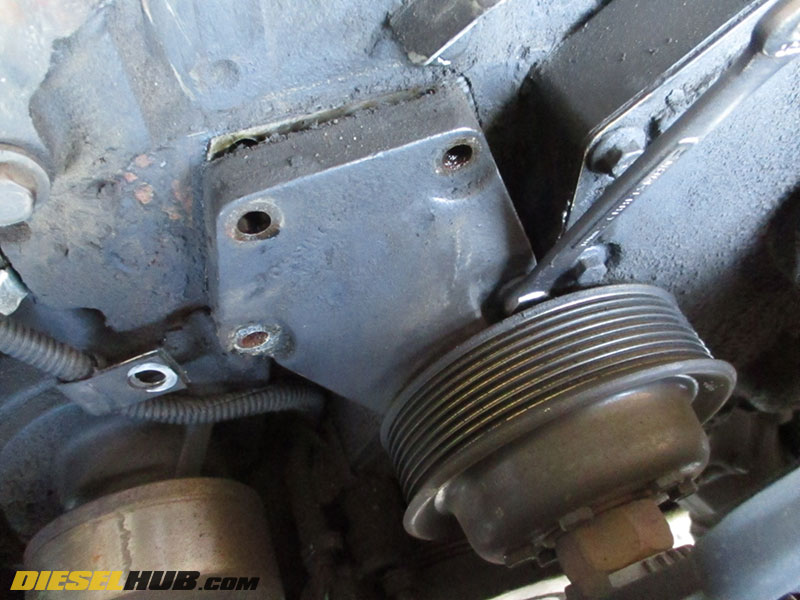
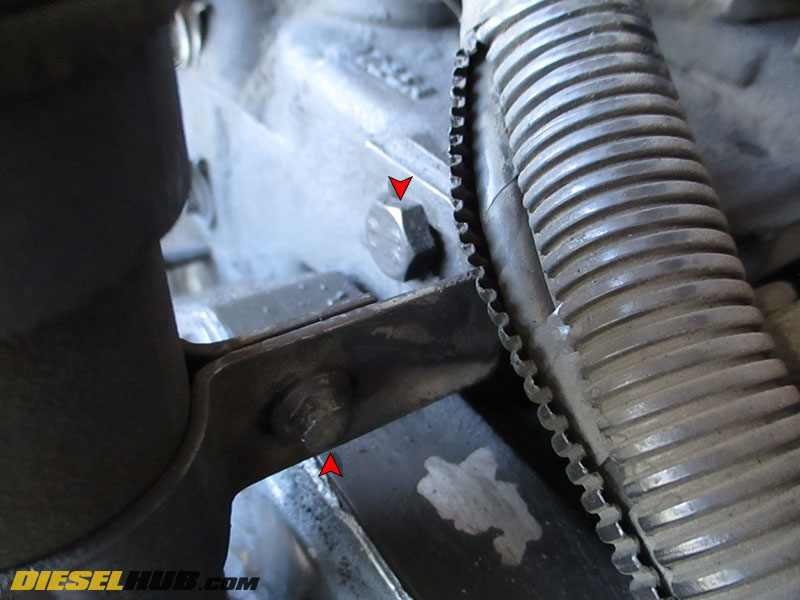
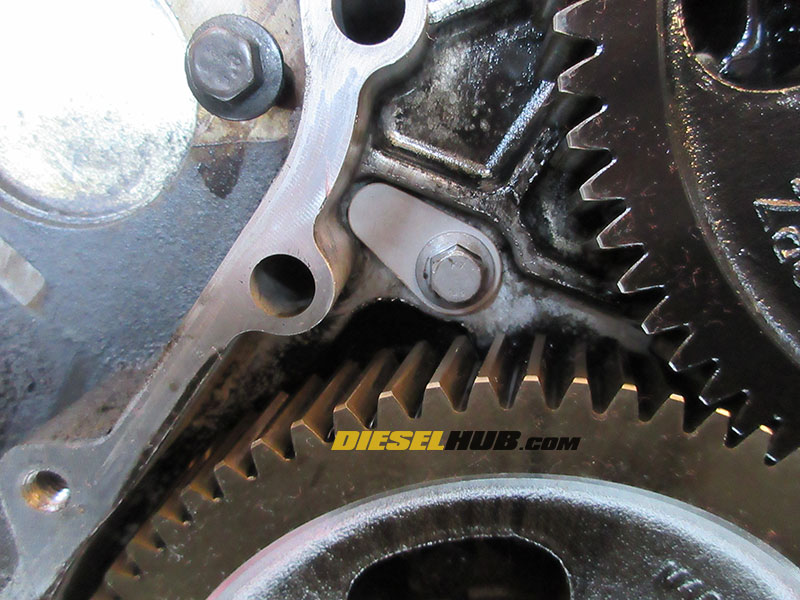
• The dowel pin is located above the camshaft gear and to the passenger side of the injection pump gear.
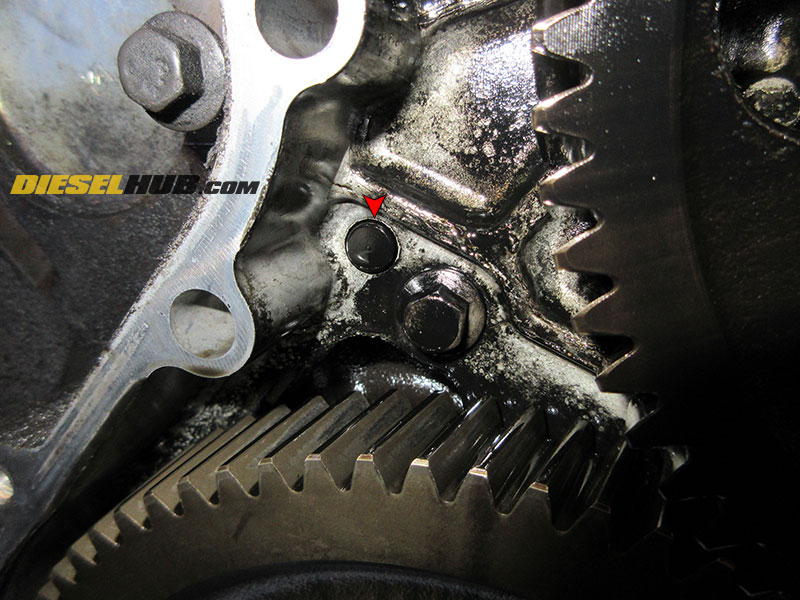
• Use a brass punch to re-seat the dowel pin in the engine block (it must be flush with the gear housing for the tab to fit over it).
• Remove the bolt adjacent to the dowel pin and clean both the internal and external threads with a solvent such as brake cleaner. Use a clean, lint free cloth to capture the solvent so that does not run down the front of the engine.
• Apply a light coating of threadlocker to the gear housing bolt, then reinstall it with the KDP tab positioned over the dowel pin; snug the bolt down securely, then torque to 18 ft-lbs.
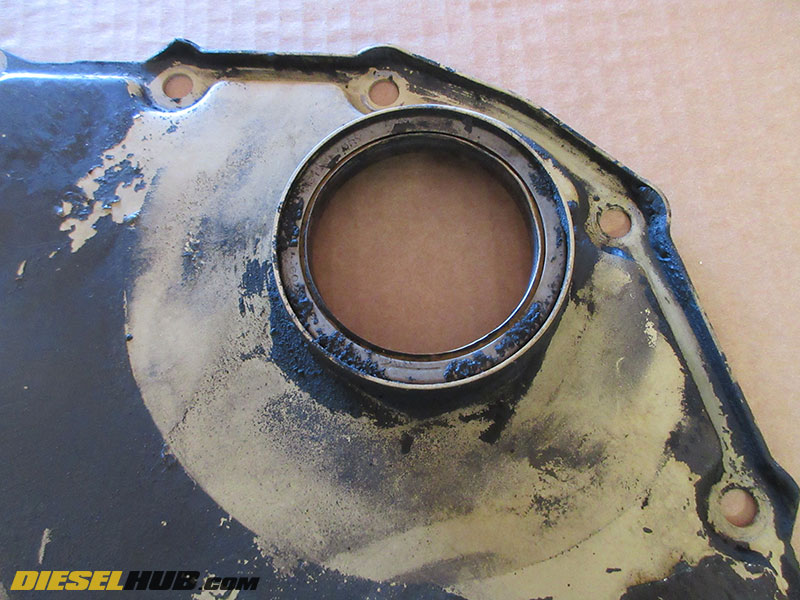
• Remove the crankshaft seal from the front cover and discard; do not damage the front cover.
• Thoroughly clean the inside and outside of the front engine cover, paying close attention to the gasket mating surface.
• If desired, now is the perfect opportunity to paint the front cover with a ceramic engine paint enamel.
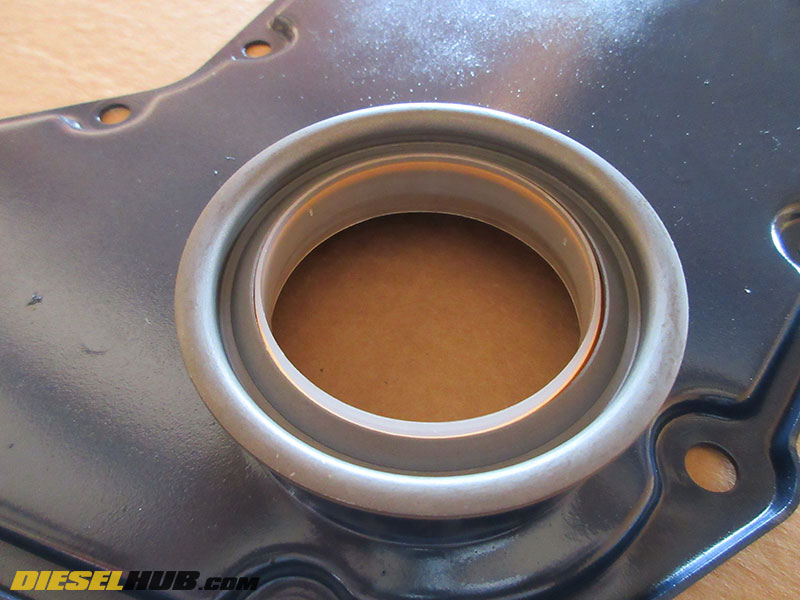
• Install the new crankshaft seal into the front cover. These seals are somewhat atypical in that there is a nylon sleeve installed on the inner surface of the seal. This sleeve must not be removed until final installation of the front cover. The metal ring provided is a tool specifically intended to help drive the seal. Apply a small amount of threadlocker to the outside circumference of the seal, place the seal in position with the metal ring installed on top of the seal, then carefully begin to seat the seal into the front cover by tapping around the circumference of the ring with a plastic dead blow hammer. The seal needs to be seated evenly, thus we recommend switching to a seal driver (such as OTC 4507) to finish driving the seal into the cover.

• Drive the seal into the front cover until the metal ring bottoms out, indicating that the correct depth is achieved and that the seal is driven evenly. Discard the metal ring, it is not to be installed.

• Clean the front cover mating surface of the engine block with a clean, lint free cloth dampened with a solvent (brake cleaner or acetone, for example). All oil residue must be removed before reinstalling the front cover. The crankshaft must also be clean for the front cover seal to seat properly.
• Run a ~3/16" bead of RTV silicon around the entire circumference of the front cover where it mounts to the engine block. We also recommend running a bead 360° around each bolt hole to ensure a leak-free fit. Do not use an excessive amount of silicon.
• Reinstall the front cover. As you position the cover seal over the crankshaft it will press out the nylon sleeve as intended. Once it is over the crankshaft, discard the sleeve.
• Snug down all front cover bolts/studs, then torque to 18 ft-lbs in an alternating/star pattern. The silicon must cure for 24 hours before starting the engine.
• Reinstall the damper to the crankshaft. Use the engine barring tool to prevent the engine from spinning and torque the bolts to 92 ft-lbs in an alternating pattern.
• Remove the engine barring tool and reinstall the plug.
• Reinstall the RPM sensor and spacer. Use a feeler gauge to set the gap between the sensor and damper to 0.049 - 0.051 inch.
• Reassemble the remaining items in reverse order as they were removed. Once the silicon on the front cover has cured for 24 hours and the engine bay is reassembled, start the engine and check for front cover leaks. We highly recommend changing your engine oil and oil filter at this time.